Artomatic 2024!

Thanks to some very gentle nagging from Jeanne Kramer-Smyth and after many years of people asking to buy prints and telling me to have a show, I’m taking the leap.

I am showing more than 50 pieces of my photography (see my new photography pages) on the 6th floor (Space #6039, on the north side of the building) of Artomatic 2024, which will be held at 2100 M Street, NW, Washington, DC from March 8 until April 28.

I’ve been waffling over whether to show more of a sneak preview here, or to preserve the impact of the in-person experience—at least for the first couple of weeks of the show. But if you follow me on Facebook or Instagram, you have seen most of the images I am showing (although in fairly low resolution). [EDIT: With two weeks left of the show (closes April 28), here’s a link to my online Artomatic gallery—but if you want a piece, it’s better to contact me before buying directly from SmugMug.]

The in-person images are much richer, and seeing them all on the wall together is quite gratifying. It was a real pleasure putting the installation together. I had a lot of help and encouragement from many people including Andrea Mercado, Dorothy Hickson, Seth and Denise Winnick, Colin MacDonald, Michael Anthony Thomas, Christine Mayman, Jane Brown, Derek and Sheri Nestell, Sara Mazursky, Michelle Parrish, Matthew King, Corwyn Jeffers, George Seidel, Pamela Jones, Peter Roberts, and the other Artomatic volunteers and artists (especially Alex of Plaza Artist Materials).

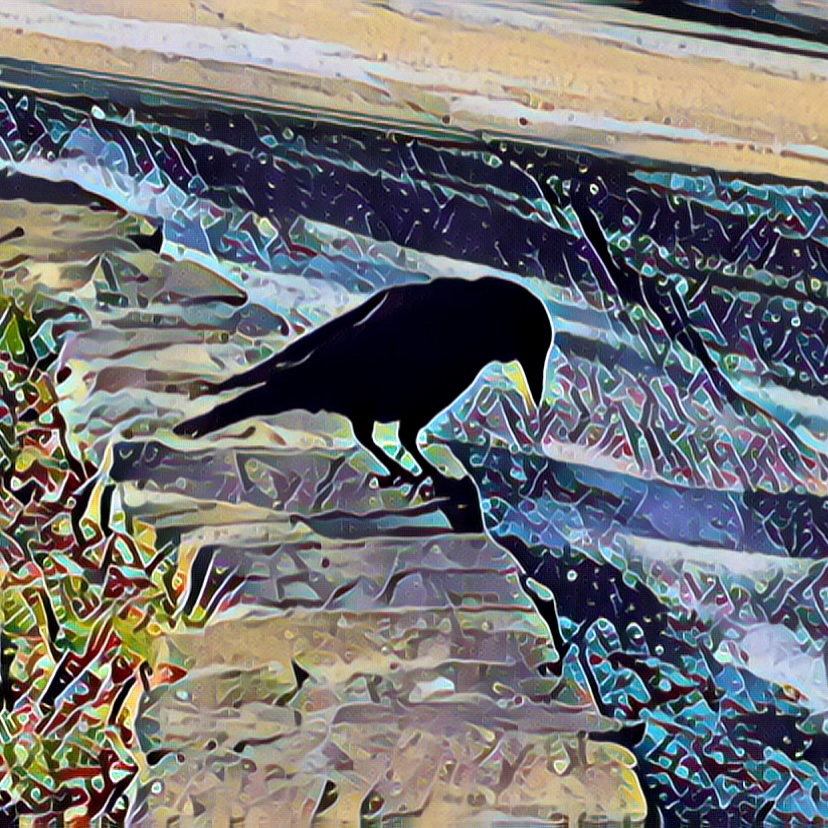
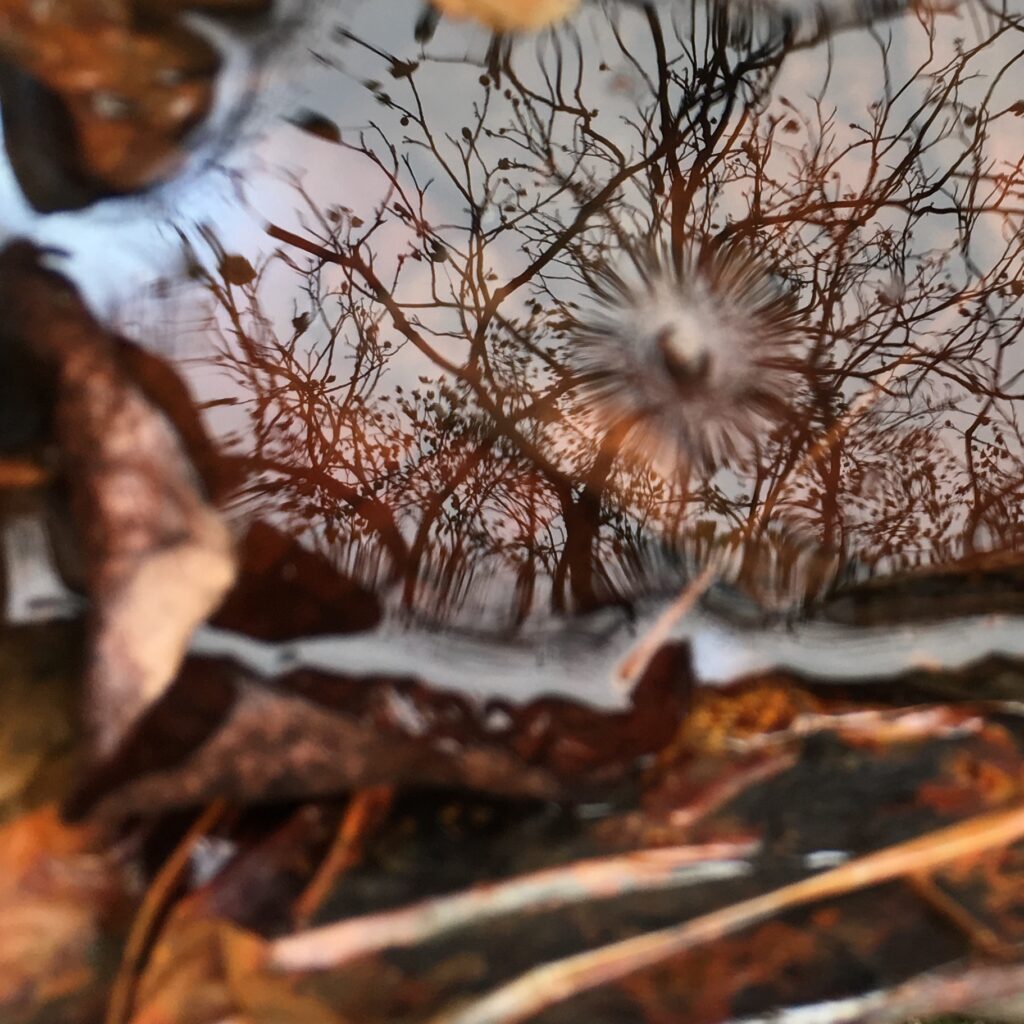
Editing details of above images: Crow image edited in the Prisma app using the “Marmalade” filter. The other two are unmodified except for cropping.

Split infinitives and smash the patriarchy

I just posted a little rant (in a Facebook group about linguistics) about the supremacist attitudes inherent in certain grammar “rules.” My rant ended with “In short: Split infinitives and smash the patriarchy.” This message seems to be resonating with a lot of folks, and I have a friend working on a graphic design for stickers/t-shirts/etc.

I’ll put the whole rant here soon; I just wanted to get this post up right away for intellectual property purposes.

History is Personal: Columbus, Protest, and Baltimore

This is not going to be an in-depth treatise on Christopher Columbus, or a history of protest, or a detailed condemnation of the ingrown injustices that have made Baltimore what it has been, and what it is. This is my personal reflection on a moment in time, in a small space that means a great deal to me.

I’ve been meaning to write this piece since July, but I’m enjoying the feeling of writing it today, a day that used to celebrate a plunderer and profiteer, but that in some places has been reclaimed to celebrate indigenous peoples.

I have worked in Baltimore since 2011. My office is in the Inner Harbor, and I park in Harbor East—two of the most moneyed and tourist-focused areas of the city. The police presence is constant and visible. Young professionals in expensive “athleisure” clothes walk their small-breed condo-friendly dogs along the waterfront promenade between the aquarium and the Whole Foods, passing the Four Seasons Hotel, the Johns Hopkins Carey School of Business, the UnderArmour flagship store at the edge of the marina, the restaurants with multi-paragraph dress codes posted outside.

I don’t only see the money; I see what feeds it, and what it eats. I see the hotel workers grabbing a break in the loading dock that smells of cigarettes and bleach (the laundry vents into the loading dock). I see the panhandlers on the footbridges, taking their benevolent bridge-troll tolls, overlooking, overlooked. I see the restaurant staff, the street sweepers, the people raking up the post-storm flotsam-jam in the Jones Falls canal, feeding driftwood and garbage up the conveyor belt to Mr. Trash Wheel.

I see the Railing, a landmark I walk past so often it gets a capital letter. To me it has become a canvas not only for skateboard-colors but for complicated thoughts about Baltimore’s industrial past and creative present. I have taken photos of it almost every week since December 2015—almost every week, that is, until March of this year, when the pandemic sent me to work from home. Of all the things I miss about working in Baltimore, it’s the Railing I miss the most. I have gone back to see it twice, once in April and once in July.

In April it was a pure hunger to see what was happening, what marks were still there, what if anything had been newly-laid. (Yes. New color, and new rust, and recent scrapes peeling up fresh vinyl—the peeled-up fragments don’t stay intact for long, so they are like finding a campfire with still-live coals under the ash: Someone was here, less than a day ago.)

In July, the impetus was bigger—not more urgent, but more philosophical. Six weeks after the murder of George Floyd, as Black Lives Matter protests grew and spread, protesters in Baltimore tore down a statue of Christopher Columbus. Reports said the statue was thrown into the harbor, which I doubt; I can’t imagine the protestors carrying the statue a whole block just to get it into open water. That statue was in a little park across the canal from the Railing. For days, I couldn’t stop thinking about whether I would be able to see the Railing from the now-empty plinth where that statue had stood (a symbol of pride to some, but of shame and lies and oppression to many, many more).

Yes. I could. I can.

Follow the line of text “The Santa Maria” to the white line above the canal’s stone wall. That’s the Railing.

It feels important, this moment. It anchors me to history in a new way. I have been doing my work and making my art and walking my paths in that space for years, and now it is connected to this paroxysm, this one small landslide toward justice in these strange tectonic times. Witness.

Sassi’s Rhubarb-Jicama Slaw

In 2013 I invented a new thing: Rhubarb-Jicama Slaw. The “recipe” is buried inside a long narrative about duck confit and jicama fries, but then when rhubarb season comes around again I always want to give people this recipe by itself. (Because while it’s fantastic with duck, some people just have a ton of rhubarb to use up.)

Ingredients

  • 3/4-1lb of fresh rhubarb, scrubbed, ends trimmed, peeled if necessary (When I wrote this recipe it was a pound to start with but quite fibrous so I had to peel it fairly deeply, hence 3/4 lb.)
  • 1/3 cup of rice vinegar (naturally brewed, NOT “seasoned” which has sugar in it)
  • 1/3 cup of cider vinegar
  • 1/3 cup agave nectar or honey
  • 1/4 tsp cinnamon
  • 1/4 tsp Szechuan peppercorns
  • 1/2 tsp dried orange peel
  • 1 cucumber
  • 1/2 of a large jicama (or a whole small jicama, which might be better; the big ones are more likely to be starchy)
  • 4 lobes of shallot (that’s usually 2 fresh shallots, but I got the peeled kind which are already in individual lobes—I’ll julienne things all day with a song in my heart, but peeling shallots makes me grumble.)
  • 3 T grapeseed oil (or other neutral/not-noticeably-flavorsome oil)
  • 1 tsp toasted sesame oil
  • 2 tsp soy sauce
  • 1/2 tsp hot mustard powder (Chinese or Coleman’s would both be fine; I ran out of Coleman’s and bought some Chinese mustard at Penzey’s. They are very similar.)

Method

This is all about the julienne, but there’s stove work as well. This took about an hour, from picking up the knife to taking the first bite. You could use a food processor for some of it, or a mandolin if you’re not terrified of them.

  1. Make brine: In a small saucepan, combine the vinegar, agave/honey, peppercorns, cinnamon, and orange peel; set over medium-low heat while you julienne things.
  2. Julienne rhubarb. Notice that rhubarb feels amazing under the knife, like smooth-grained wood, as though julienned is all it ever wanted to be and it can’t believe we’ve all been cutting across the grain instead of along it this entire time. Put half of the rhubarb in a 2-cup Pyrex measuring cup or other heat-safe container (it’ll be about two cups, not packed). Reserve the remaining half (which you aren’t going to pickle).
  3. Make quick pickle: Jack up the heat under the brine so it boils. Let it boil for maybe 30 seconds and then pour it over the rhubarb in the heat-safe container. Set that aside (on the counter, not in the fridge).
  4. Deal with jicama: Peel and slice the jicama into thin planks. Taste a piece. If it’s starchy, you’ll need to blanch it. (Sometimes jicama is juicy and sweet—if it’s like that, go with it and skip the blanching part). Rinse out the saucepan you used for brine (or maybe a larger saucepan; use your own judgment) and fill it with fresh water; put that over high heat and keep an eye on it. Go ahead and finish julienning the jicama.
  5. Cucumber time: Peel the cucumber, split it lengthwise, and scoop out the seeds with a spoon. Split it across so you have quarters; do your best to julienne them. (There’s no shame here. They are slippery and treacherous.)
  6. Back to the jicama: If your jicama needed blanching, now’s probably the time: When your water is boiling, put the julienned jicama in it. Count to thirty. Drain the jicama into a colander and rinse it very well with cold water. Set the colander on a plate and put it in the fridge.
  7. Shallots: Peel them (unless you were lucky enough to find pre-peeled ones). Cut them very thinly lengthwise. You can’t really julienne them because they are too curvy.
  8. Mix things up: Combine your raw vegetables (not the pickle yet): In a large bowl, combine cucumber, jicama, shallot, and raw rhubarb.
  9. Weird existential pause: (Normally at this point I switch gears and cook the protein. The pickling-rhubarb needs at least another half-hour in the brine.)
  10. Pickled rhubarb: Scoop the rhubarb out of the pickling brine (don’t toss the brine!). Add the pickled rhubarb to the big slaw bowl.
  11. Make dressing: In a bowl you like to whisk things in, put 1/4c of the brine and whisk in the mustard powder and the soy sauce* and then the grapeseed and sesame oils in as thin a stream as you have patience for, whisking thoroughly. (Now you can discard the rest of the brine, or save it for another round of pickling, or use it in a shrub, or whatever.) *Originally I had the soy sauce in the brine, but that makes the leftover brine less versatile.
  12. Dress your slaw: Just before serving**, whisk the dressing to recombine. Pour the dressing over the slaw and toss gently but thoroughly. Taste for seasoning and add more soy sauce or Szechuan pepper or maybe a little lime juice or fish sauce if you like. (**You could do this a little bit ahead of time, but not too long or the dressing pulls water out of the vegetables and makes things a little less spectacular though more harmonious—it’s still good the next day, but different.)
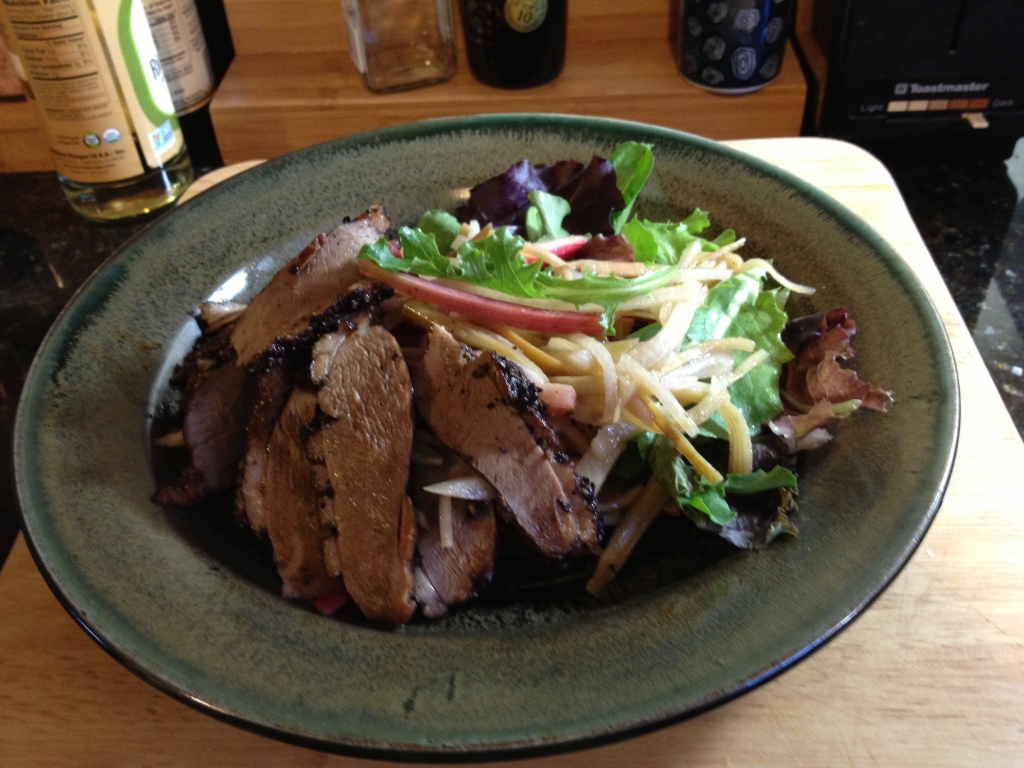
Rhubarb-Jicama Slaw, Take 1 (2013), placed on top of mesclun mix and topped with duck breast. (I’m not proud of the cook on that duck. Don’t @ me.)

Smash the Tyranny of Step Count

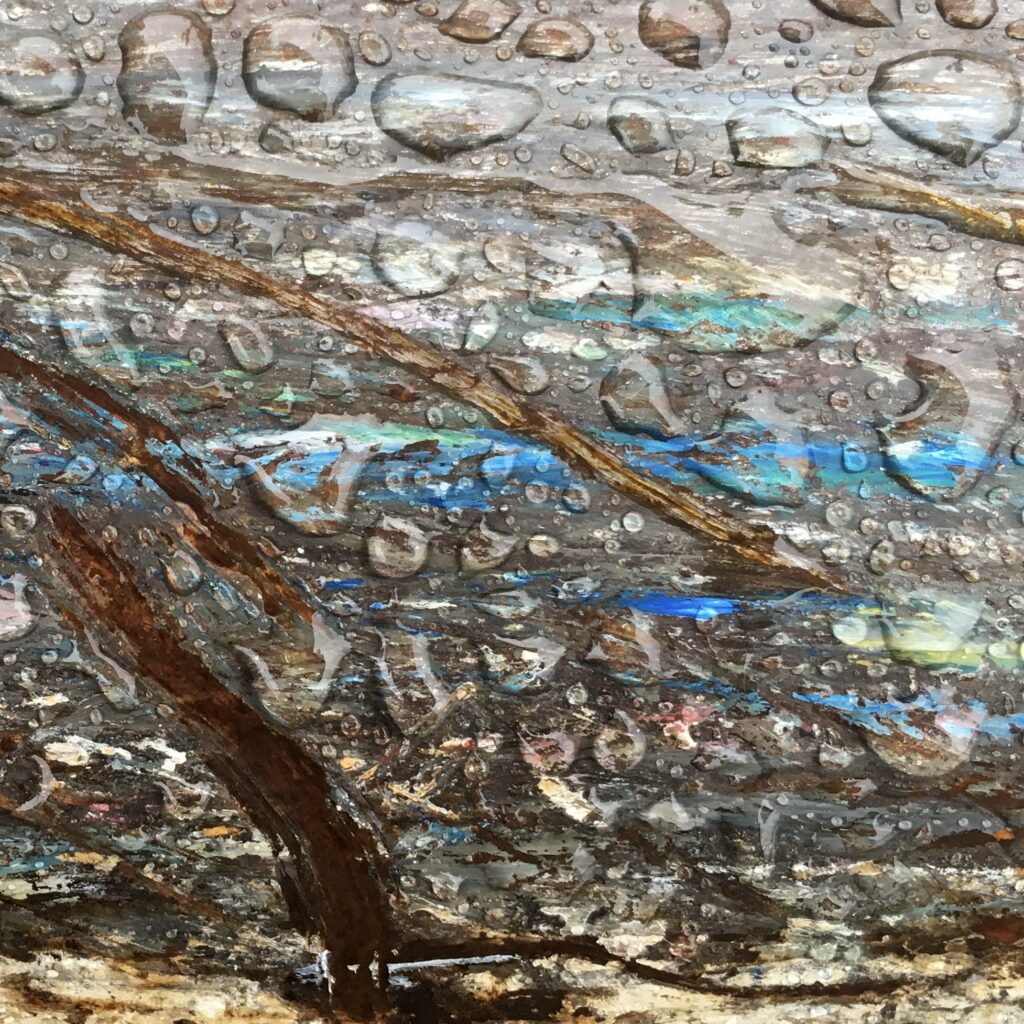
Bridge patina, Sligo Creek

I can’t remember the last time I went for a walk without a pedometer, or as part of accomplishing a task (like getting from my car to my office, or mailing something, or going to a market).

For some time I’ve been trying, with mixed success, to go for a walk at lunchtime whenever I am working from home. That used to be twice a week. Now that I telework every day, the walk is more urgent. Today I carefully mapped out a route that is 2.5 miles (according to GMap Pedometer) and has a good selection of terrain—steep hills, flat stretches, two parks with things to balance on. Somehow that had become the value of a walk: How many steps. How many obstacles. A quota. Quantifiable.

Two blocks into today’s walk, I went off the map.

Continue reading Smash the Tyranny of Step Count

The Distancing

“The Distancing” is a new category of my blog. At this writing, COVID-19 is a pandemic, with more than 1 million confirmed cases worldwide—of which more than a quarter are in the United States. I have been working remotely for just over two weeks (my last day in the office was March 16, when I was rescuing some houseplants).

Continue reading The Distancing

Cosmic Crisp: First Impression

TL;DR: The Cosmic Crisp is a very good apple, with more complexity than Honeycrisp and spooky keeping qualities. You should try a couple if you see them in a store.

Plenty of other folks (including The Allusionist, Helen Zaltzman) have written and talked about the unprecedented hype surrounding the December 2019 release of this new apple. I bought two Cosmic Crisps at my first sighting, which was at the Trader Joe’s on Colesville Road in Silver Spring, Maryland, on Saturday, January 12, 2020.

Heft: Both of my samples were huge (8/10ths of a pound)—larger than I typically want to eat in one sitting, but that doesn’t matter (see below re. its qualities after cutting). Feels dense and heavy in the hand. [EDIT: Beginning in the winter of 2022, I began seeing smaller examples, including bags of snack-size apples (approx. four to five ounces each vs. the 13-oz. monsters that hit the market first).]

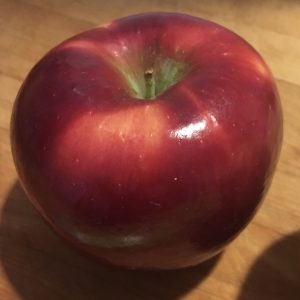
Portrait of a Cosmic Crisp showing off its colors.

Visual impressions: This apple is gorgeous. You need an apple for a new version of Snow White? Here’s your star. Broad-shouldered, narrowing at the base. Deep ruby-wine color, like a Tempranillo or a Cabernet Sauvignon, freckled with small pale lenticels. This combination reminds some people of stars in the night sky (which according to this episode of The Allusionist is where the name came from.) This striking background is further enhanced by elegant flamelike shademarks—the dapples in an apple’s color that happen because a piece of fruit has a leaf or twig that keeps a portion out of the sun. My two samples also had a surprise bit of bright green in the cavity (the dimple around the stem).

Continue reading Cosmic Crisp: First Impression

Sassi’s Toasted Pumpkin Seeds, Four Ways

Now five ways! Updated for 2018; originally posted November 19, 2017

I have a recipe/technique I love for toasted pumpkin seeds, but it’s buried in/interwoven through this Lamb and Pumpkin Stew recipe. So no-one has to dig through that one, here’s the pumpkinseed recipe on its own, with some other flavor combination experiments:

  • Gut a pumpkin (or multiple pumpkins).
  • Get most of the goop off the seeds.
  • Soak goopy seeds in heavily smoked-salted water overnight. (You could use un-smoked salt, I guess, but I like the extra layer of flavor.) I used 6 cups of boiling water and 1/2 cup of smoked salt + 6 cups of cold water, but I was soaking about ten pumpkins’ worth of seeds (I had managed a big community pumpkin-carving activity, with lots of people all carving pumpkins on the same porch, and it seemed a shame to throw so many seeds away…). So, the proportion is 2 tsp salt to every cup of water, and you need enough water to cover your seeds. (They’ll float. Don’t fret.) 2018 update: You can leave the seeds hella goopy when you soak them, and then–instead of trying to get the seeds out of the goopy brine, try to get the orange goop out instead. This was a lot faster, for some reason. A spider is also very helpful (the kind that’s like a small wire mesh colander-on-a-stick, used a lot in Asian cooking, not the arthropod).
  • Rinse them off the next day. Lay a flour sack or linen tea towel on a sheet pan, and spread the seeds out on that to dry. (Do not use a loopy-pile towel or paper towels–too much stickiness/fiber transfer/annoying and gross.) It will take them a day or two to dry–just move them around a little whenever you walk past them, until they are dry to the touch. (2018 update: It occurred to me that I was writing from a place of privilege here. You can definitely dry them in a very low oven—180 degrees or so, for about 90 minutes—if you were in a hurry or if you are afflicted with kitchen vermin. I’m not judging. I lived in a hella roachy apartment building for a long time, and I know it’s not about your housekeeping; it’s about their knack for surviving anything once they have a foothold).
  • When they are dry, preheat the oven to 275 degrees. (I like a slow oven. Some people roast seeds at 350 or 400 or even 425, but I like to give them a lot of time to dry out and crisp vs blasting them with heat and risking scorching. Sort of like the “slow and golden” school of marshmallow roasting vs the “set it on fire!” school.)
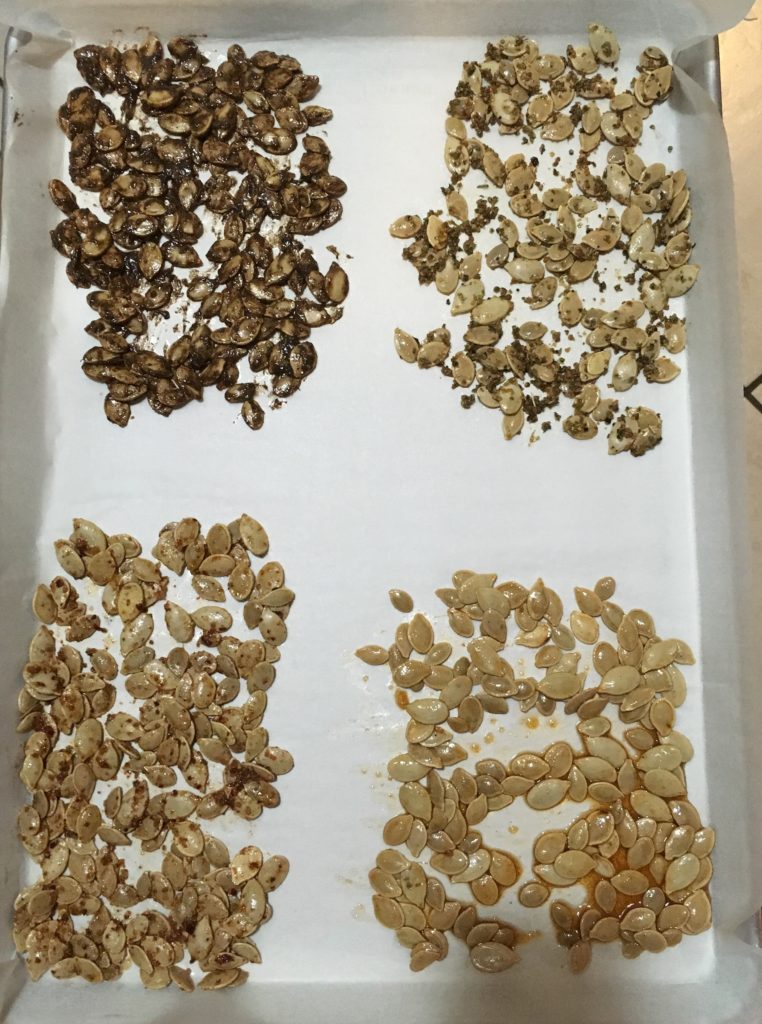
  • Coat your seeds with some combination of seasonings that you like. I did four different kinds today. For 1/2 cup seeds, you want about 2 tsp fat and 2-3 tsp of other flavorings. (2018 update: I did the bacon-mushroom-thyme one again, and a new honey-orange, below.)

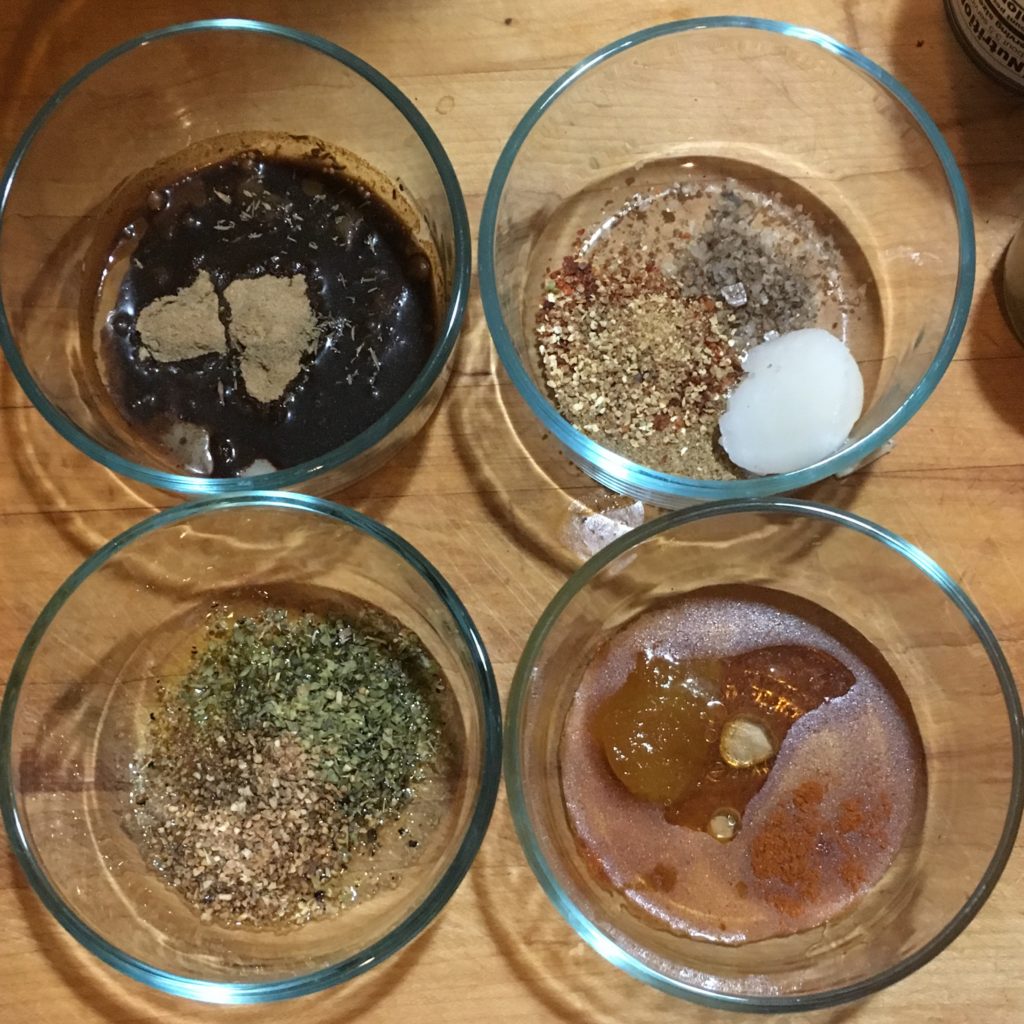
Four Pyrex bowls with four different flavor combinations

Bacon Mushroom Thyme (for omnivores)

  • 1/2 cup cleaned/soaked/dried pumpkin seeds
  • 2 tsp bacon fat
  • 2 tsp Worcestershire sauce
  • 1/2 tsp thyme
  • 1/4 tsp pepper (I fresh-ground peppercorns in an electric spice grinder)
  • 1 tsp porcini mushroom powder (standard caveat re. “I have access to weird ingredients”–the porcini powder was a gift from my dear friend/culinary partner/instigator Derek)

Spicy Orange Duck (for omnivores)

  • 1/2 cup cleaned/soaked/dried pumpkin seeds
  • 2 tsp duck fat
  • 1/2 tsp applewood smoked salt
  • 1/2 tsp ground coriander
  • 1/2 tsp dried orange peel
  • 1/2 tsp Aleppo pepper

Spicy Honey (vegetarian)

  • 1/2 cup cleaned/soaked/dried pumpkin seeds
  • 2 tsp grapeseed oil
  • 1 tsp honey
  • 1 tsp sherry vinegar
  • 1/4 tsp ground cayenne pepper

Vaguely Greek* (this one is vegan)

  • 1/2 cup cleaned/soaked/dried pumpkin seeds
  • 2 tsp olive oil
  • 1 tsp fresh lemon juice
  • 1 tsp oregano
  • 1 tsp dried lemon peel
  • 1/4 tsp pepper

*If I do this one again, I would either infuse the oregano in the oil for longer first, or I would add the oregano partway through the toasting. This time through, the oregano got quite scorched.

Different Spicy Honey (2018)

  • 1/2 cup cleaned/soaked/dried pumpkin seeds
  • 2 tsp grapeseed oil
  • 1.5 tsp Mike’s Hot Honey
  • 1 tsp sherry vinegar
  • 1/8 tsp ground cayenne pepper
  • 1/2 tsp dried orange zest
  • Big pinch of smoked salt

The method is the same for all the flavorings:

  • Put your seasonings of choice in an oven-safe bowl that is big enough for however many seeds you want to do.
  • Warm seasonings in the oven for about 5 minutes so fat melts/honey liquifies/flavors combine; whisk with a fork.
  • Add seeds and stir to coat.
  • Spread out in a single layer on a sheet pan–you can put baking parchment on the sheet pan if you want (I did, just for easier cleanup).

Four different pumpkin seed flavor combinations on one sheet pan

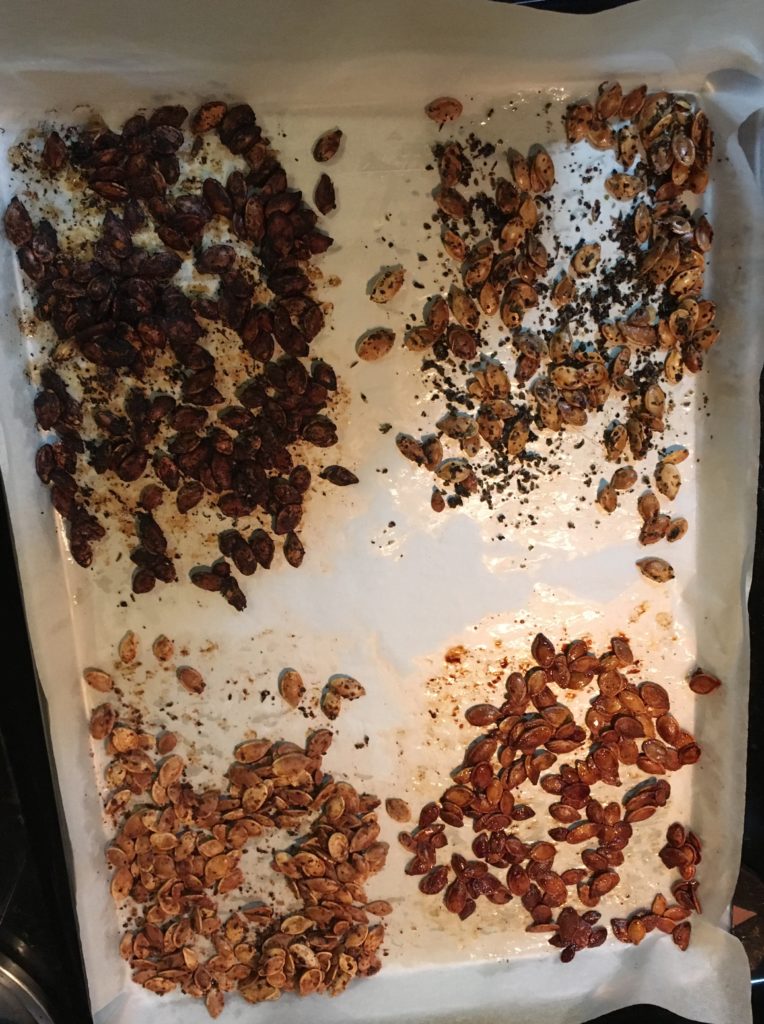
  • Toast them for about an hour and a half, stirring every 15-20 minutes, until they are toasty-gold and/or they make dry-autumn-leaf rustling sounds when you stir them. Kind of hard to say because different seasonings have vastly different color and burnishing clues. This is a long time, I admit, but this low temperature/long time makes the seeds very crispy, which to me is the most important quality.
  • Take them out of the oven and try not to burn your mouth. They’ll stay good for more than a week in a ziploc bag or airtight container, but they probably won’t last that long.

Four flavors of pumpkin seeds, all toasted. My kitchen lighting is terrible.

Simone’s Make Friends with Kale Salad

I originally posted this as a Facebook note in January 2013, but people ask me for this recipe from time to time and Facebook notes are getting weird. (e.g., I post a link that works for me, and other people can’t access it.)

A friend commented on the note, “Make Friends With Kale Salad? As in, ‘Become a friend of kale,’ or ‘Use kale to make friends with others’?” The answer is “Both!”

This makes a lot—my biggest salad bowl. I usually make it for potlucks/parties, and I don’t think I have ever had leftovers—but if I did I would be happy, because it’s kind of a pain to make only three or four servings of this, and it keeps long enough to eat for lunch a few days in a row.

  • 2 bunches kale–green curly, red curly, Lacinato, or a combination
  • 3 cups other salad green(s) you like. (I like a mix of parsley and arugula best.)
  • 2 bunches scallions (or about 6-8 shallots, if the scallions at your grocery store are pathetic)
  • 2 Granny Smith apples (or other apple you like/can get)
  • Fresh garlic as you like—at least 2 fat cloves, up to 8 fat cloves
  • 3 lemons
  • 1/2 c extra-virgin olive oil
  • Champagne vinegar or white wine vinegar (possibly—depends on how juicy the lemons are)
  • 1.5 tsp Penzey’s shallot pepper seasoning, or a mix of salt, pepper, and dried herbs you like in salad
  • 2 tsp Dijon mustard

Ideal equipment: Knife, whisk, huge salad bowl, salad spinner, garlic press, lemon reamer, liquid measuring cup with spout.

Tear the tough stems out of the kale (like 2/3 of the way up the leaf—leaving some stem is nice for texture, especially with red kale which is so pretty) and wash it in two changes of water. Spin dry and set aside.

Trim parsley and arugula to your liking; wash in two changes of water (curly parsley in particular can hold a lot of grit); spin dry and set aside.

Press the garlic into the salad bowl. You could also mince/smash/mash it with a bit of sea salt if you’re all anti-garlic-press like Anthony Bourdain, or if you don’t have a garlic press.

Wash the scallions, trim off the root ends and any wiltiness at the top of the greens, and slice them as finely as you have patience for. Put them in the bowl with the garlic. (If using shallots: Peel, trim root ends. Mince a couple of them; slice the rest very thinly and muddle them a little so they fall apart into rings.)

Squeeze the lemons into the liquid measuring cup, pick out the seeds with a fork, and add vinegar if necessary to make 3/4 cup. Pour over garlic and scallions-or-shallots. Add seasonings and mustard. Mix well with whisk.

Pour oil very slowly into the lemon juice/vinegar/allium/mustard mixture, whisking constantly.

Quarter and core the apples and slice them directly into the dressing. You can make them a little chunky or thin. I like them slightly better in thin slices. Stir well to coat apples with dressing. (The lemon keeps them from turning brown).

Shred the kale and other green(s) of choice into thin ribbons (about 1/4 inch)—for the kale, stack/roll as many leaves as you can hold down with one hand and slice across. (This is called a “chiffonade.”) For the other green, just use your own judgment. (Arugula and parsley are too small to use the chiffonade technique so I just bunch ’em up and chop pretty finely.)

Add greens to salad bowl and toss gently but thoroughly until well coated with dressing.

This can sit at room temperature for several hours (hence ideal for potluck) and in the fridge for a couple-three days without getting wilty and gross.

Walnuts would be a good addition if that sounds appealing to you—but I would add them to each serving on the plate, not toss them in [because (a) nut allergies, and (b) walnuts could get soggy sitting in dressing for too long.]
Kernel: When I decided to be an artist

Franklin was asking a couple weeks ago for me to write another Imbolc blessing. Imbolc is a Celtic holiday, halfway between the winter solstice and the vernal equinox. It’s associated with Brigid, goddess of inspiration, poetry, and smithwork. For me, the holiday is also about cheese, and fire at the heart of snow, and making it through the stored foods of winter to the first through-the-frost greens and new milk. The previous Imbolc blessing I wrote was for babies—or newcomers, really. And since that writing, it has also been used as a farewell. Continue reading Kernel: When I decided to be an artist